
Imports: "Thank You (vertical)" file
About the file
If you are using the Thank You Vertical impact statement, use the ThankYou (vertical) Page submission import file to populate (up to four) paragraphs for any funds recipients in a specific reporting period.

Important:
To ensure an import file gets uploaded successfully, please review your file to ensure:
column headers match the original template exactly
your file only contains one sheet
no formulas, formatting, or additional columns are present
Best practice is to use a fresh template and copy the data into it, once you are sure your data is ready.
How to Import the file
1. Log into Impact
2. Select Import/Export from the left navigation pane.
3. On the Impact page that appears, select Create new import:

A dropdown will appear:

4. Choose the Q&A Page Submission file:

5. Click Continue. A new page will appear, with a link to download the blank file template:
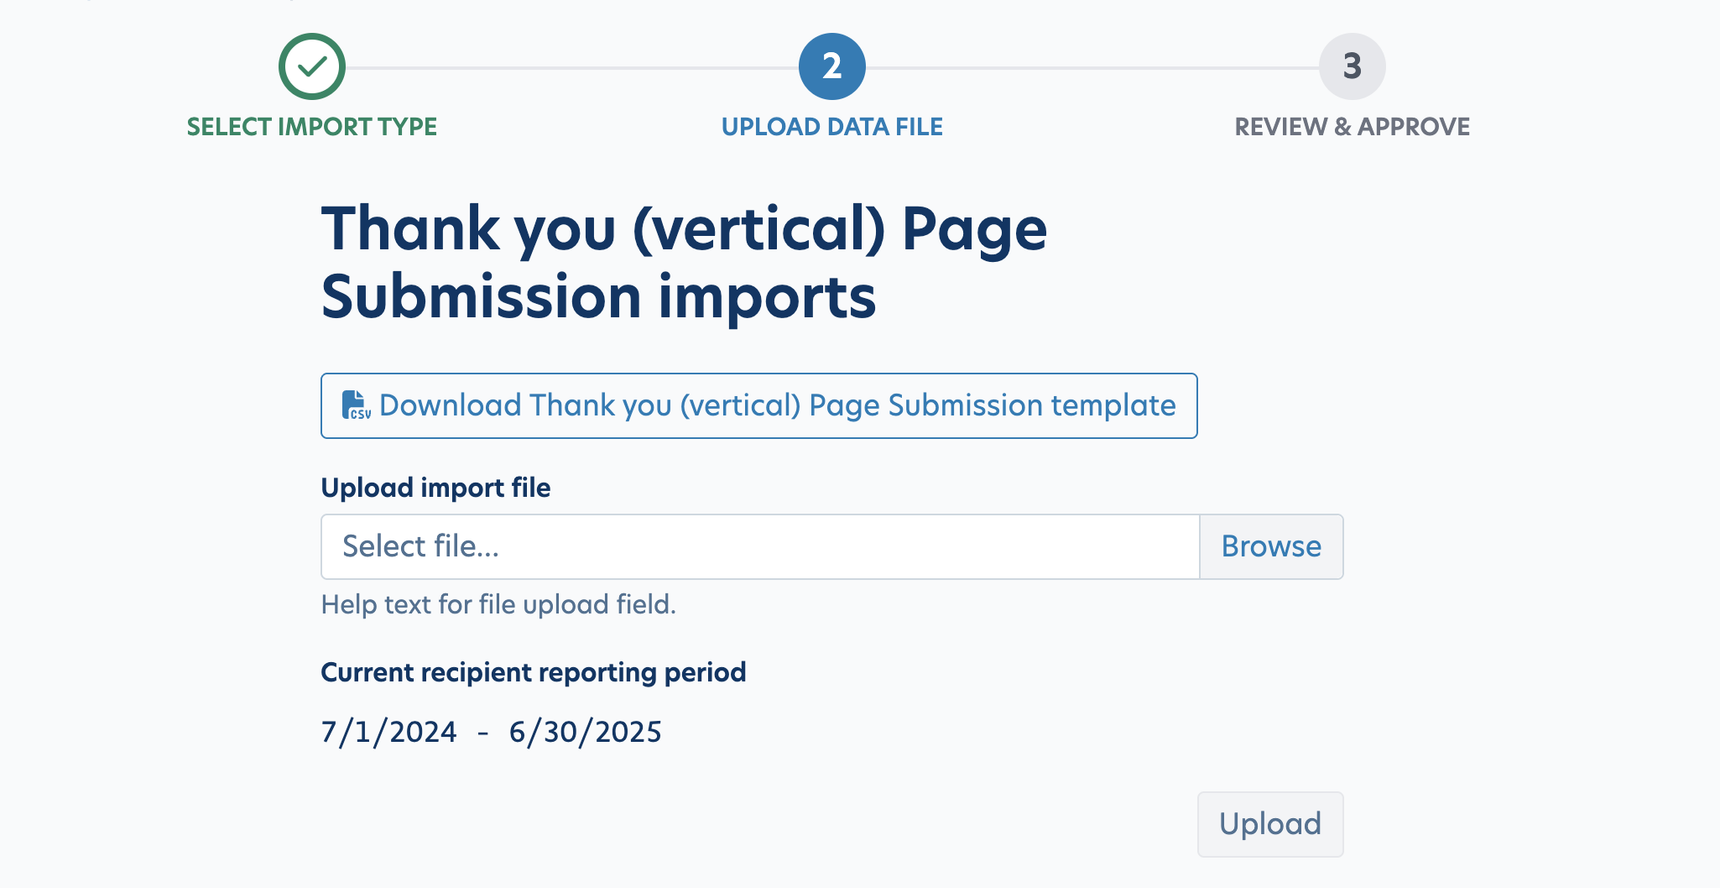
6. Click the Download button. The blank template will download as an Excel file.
7. Fill out the template with the appropriate data, according to the column headers. DO NOT ALTER THE COLUMN HEADER NAMES. Also, do not add additional columns or additional sheets.
Columns in this file are:
ID: This is an optional field to associate an ID number with each Thank You (if applicable)
FirstName: Recipient’s first name. (Required)
LastName: Recipient’s last name. (Required)
RecipientID: This is whatever ID you use in your system of record for your recipients. (Required)
Email: Recipient’s email address. (If no email address, put NA)
ClassYear: Recipient’s graduation year. (Recommended)
Major: Recipient’s major. (Required)
Minor: Recipient’s minor (if applicable).
Hometown: Recipient’s hometown. This is usually written with city name and state abbreviation, eg. Miami, FL. (Required)
International: If the recipient is from a country other than the United States, put "Yes" in this column. If the recipient is not International, put "No". (Required)
Paragraph 1-Paragraph 4: up to 4 paragraphs of a Thank You letter
Note: There can be fewer than four paragraphs
RecipientType: Fellowship (Required)
FundID: Corresponding Fund ID. (Required)

Please note: FundID must exactly match the fund’s GLID in Balance.
8. Once your file is filled out and saved (the name of the file can be whatever you wish), click the Browse button, select your file, and click Open.
9. Click the Upload button. If there are any issues with the upload, an error message will appear with details on how to fix the issue.
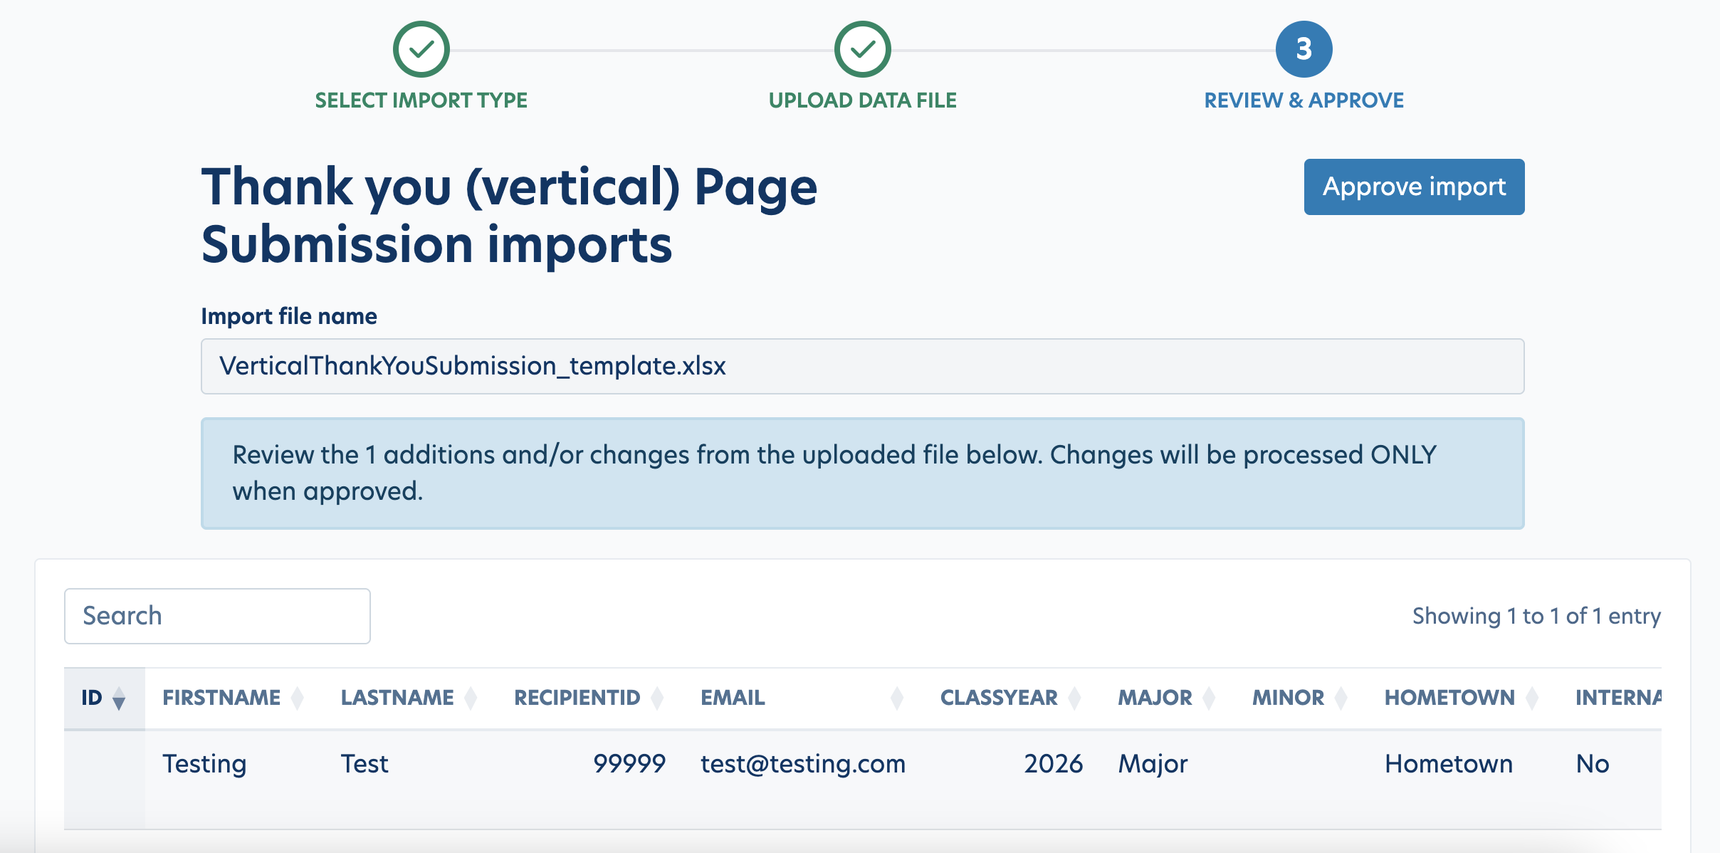
10. If there are no errors, review the changes on the screen and click the Approve Import button. Your import is now complete.
Reply
Content aside
- 2 mths agoLast active
- 12Views
-
1
Following